You must have noticed some fancy looking texts accompanying the Google results main headlines while searching for something over the internet. There are small stars in these search results as well which makes the specific link more authentic.
Being a business owner, you also tried to have all these things into your website link search results but, maybe you are not properly aware of how to get it? Well, these things are called rich snippets or schema mark up in the SEO language. Now, we are going to assist you in adding these rich snippets into your website.
What are Rich Snippets?
The concept of rich snippets is still vague in the minds of some people. First of all, you must understand it properly. Only then you will be able to employ them into your business successfully.
Rich snippets are brief pieces of additional details related to your business which are added to help the audience in reaching to the desired search result. It can be the numbers of reviews on your business, your company address, contact details or specific industry type.
Suppose that a person is searching ‘best footwear in Delhi’ on Google then, he will get plenty of results. From those results, he will most probably open 3 to 4 pages. Now, the pages he will choose to open depend on these additional details or snippets.
In this way, rich snippets will help in enhancing the click-through rates of your website. We can divide rich snippets into many categories. Some of the most popular are:
- Review ratings
- Events
- Organization
- People
- Products
- Videos
- Software applications
Rich snippets are eye-catching as they include images and brief to the point information. People are interested in visiting the pages which attract them more. Brands even hire SEO agencies of India for creating rich snippets.
How to Create Rich Snippets for your WordPress Website?
Optimizing your WordPress website for the rich snippets will provide your company an edge over your competitors. The audience will consider your site more useful and authentic after adding relevant information, reviews, contact details etc. Hence, you should know how to create and add rich snippets on your website.
For all those who are not HTML experts, WordPress rich snippets Plug-ins are the best option to set up the rich snippets. The plug-ins are easy to use as you have to fill up the required fields of information.
Now we are going to elaborate stepwise procedure of setting up rich snippets:
Step 1: Install a Rich Snippet Plug-in
Several schema mark-up plug-ins are available for you. Some of them are All in One Schema.org Rich Snippets, WP Review Pro, WP Rich Snippets and Rich Snippet WordPress Plug-in by CodeCanyon.
It will be best for the beginners to choose All in One Schema.org Rich Snippets as it is a freely available plug-in which serves the basic purpose of creating rich snippets. If you want to optimize a few posts of rich snippets then, this one is ideal for you.
Installation Process:
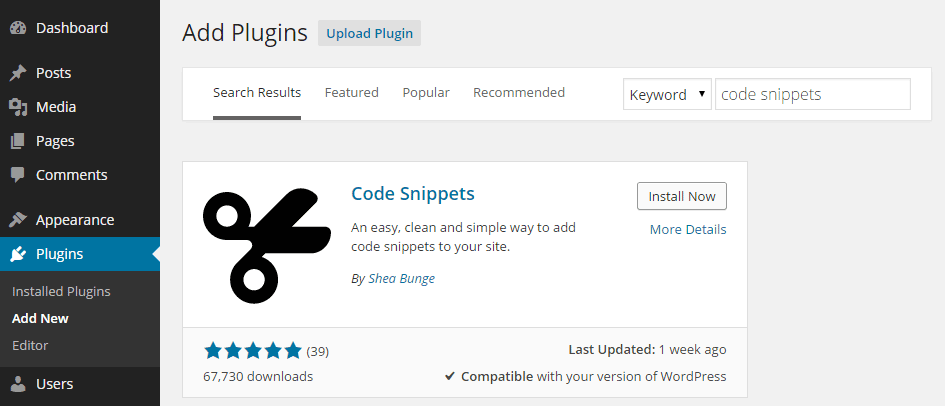
- Open your dashboard of WordPress then go to Plugins > Add new > Write ‘All in One Schema.org Rich Snippets’ in the search box > Upload the plug-in zip file.
- Open FTP then upload the plug-in into ‘WP-content/plugins’ and activate it through the ‘plug-in menu’.
- Your plug-in is successfully installed.
- Now you can find the ‘rich snippets’ tab on your WordPress dashboard on the left side.
 Step 2: Configure and Add Schema to WordPress
Now, the schema mark-up function is already added into your WordPress. You can configure what shows in it. After configuring, you will have to specify whether you like to display rich snippets or not while creating each post/page.
- To set the configuration, go to the rich snippets page of your WordPress site. There you will find a configuration tab. Under the tab, you will see all of the rich snippets types.
- You will see several fields related to a particular snippet type after clicking on it. You don’t have to do any changes on this page. Just review it to know which rich snippets will be shown on Google under your website link and remove the unnecessary items. For instance, you can remove the review date in the item review tab if you wish to.
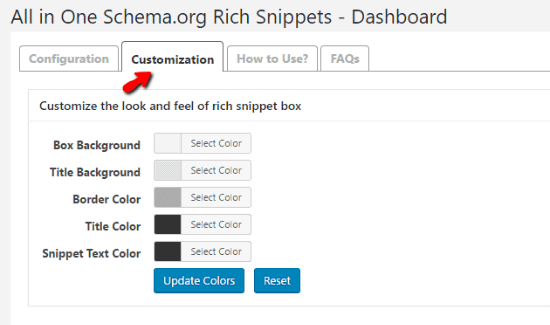
- In addition to this, you can also customize the colors of your rich snippets by going to the customization tab. However, it is only for WordPress, and it won’t appear in a customized way on Google search result.
Step 3: Create/Edit a Post
- Initially, you have to go to the posts section and click on add new post. You can also add rich snippets to a page you have already created.
- Now compose your post as you regularly do in WordPress.
- Type the title, fill the body of text and scroll below the text editor in order to find the rich snippets tool.
Step 4: Configure Rich Snippets on the Post
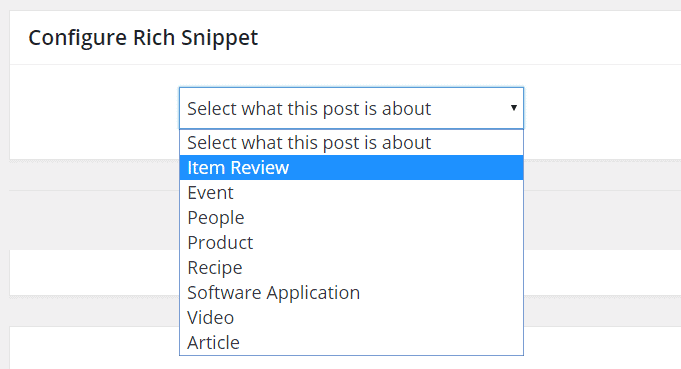
- You will see the ‘configure rich snippet’ module in the rich snippets tool.
- Click on the drop-down menu to look for more options.
- It will ask you to ‘select what this post is about?’ and you will get options like item review, event, people, product, recipe etc.
- For example, you want to choose item review then you will have to add the item of review, reviewer’s name, date, rating etc. You will find different fields to fill up on selecting varied options like that.
- After publishing the post, you will be able to see rich snippets added by you on the bottom of the post. They will be visible on the Google search result as well.
- To check that the rich snippet is working properly; you have to plug your post’s URL into Google’s Structured Data Testing Too
So, in this way you can easily add rich snippets on your website. If you still l didn’t get it properly then, you can seek professional help by hiring an SEO agency of India.