Let’s start with defining what even SSL is. Being one of the most important aspects of any site, SSL or Secure Sockets Layer is a security technology used to secure server-to-browser transactions. Usually, this includes securing any information being passed by a browser to a web server.
SSL Certificates are small data files that bind a digital key to an organization’s details.
Installing an SSL Certificate on a web server activates a padlock and the HTTPS protocol, allowing a secure connection between the web server and the browser. Generally, SSL is used to secure credit card transactions, logins, data transfer, any sensitive data exchange, securing webmail and apps like Outlook Web Access, securing workflow and virtualization apps, connections between an email client and an email server, transfers over HTTPS or FTP services, and even social media site browsing.
We can say that SSL certificates bind together domain names, hostnames and/or server names, and also organization identity and location. To establish a secure session with the browser, an organization has to install the SSL Certificate onto its web server. After installation, the webserver can be connected to a website via https://www.domain.com for the webserver to establish a secure connection with the browser. When this connection is established, all traffic between the two will be secure. Whenever the connection is realized using SSL, all communication will be encrypted and secure.
WP Force SSL helps users redirect insecure HTTP traffic to secure HTTPS traffic and fix SSL errors without touching or changing any code.
By activating Force SSL, everything will automatically be set, and SSL will be enabled. The whole website will move to HTTPS using your SSL certificate, and it works with any SSL certificate, no matter if it is a paid SSL certificate or a free one from Let’s Encrypt. As with all products from WebFactory Ltd, there is no unnecessary bloat, only the features that save your time and are proven to work magic on your site. More than 200.000 users are using this plugin, and the reviews themselves prove the efficiency and power of WP Force SSL. Available features will greatly help you with managing SSL Certificates on your sites; those include a unified dashboard for all options, content scanner, rebranding option, White Label mode, Keyless activation, Real-time monitoring, certificate installation, etc. We will explain in more detail some of those features.
Certificate installation
Adding and enabling SSL has never been easier. The majority of hosting companies support the free SSL certificate from Let’s Encrypt.
The whole process is pretty easy; after logging in to your hosting panel and adding the SSL Certificate by using the button “Add SSL Certificate” or “Add Let’s Encrypt Certificate,” you will enable the SSL on your site with WP Force SSL with one click. Using the PRO version is even easier to set up; the plugin will generate the free SSL certificate for your site, and the certificate will be regenerated every 90 days.
SSL Monitoring
Installation and configuration of the SSL certificate is not the end of this process. The real-time SSL monitor helps you keep track of your certificates by monitoring more than 50 possible errors on your site, for example, if the certificates have expired.
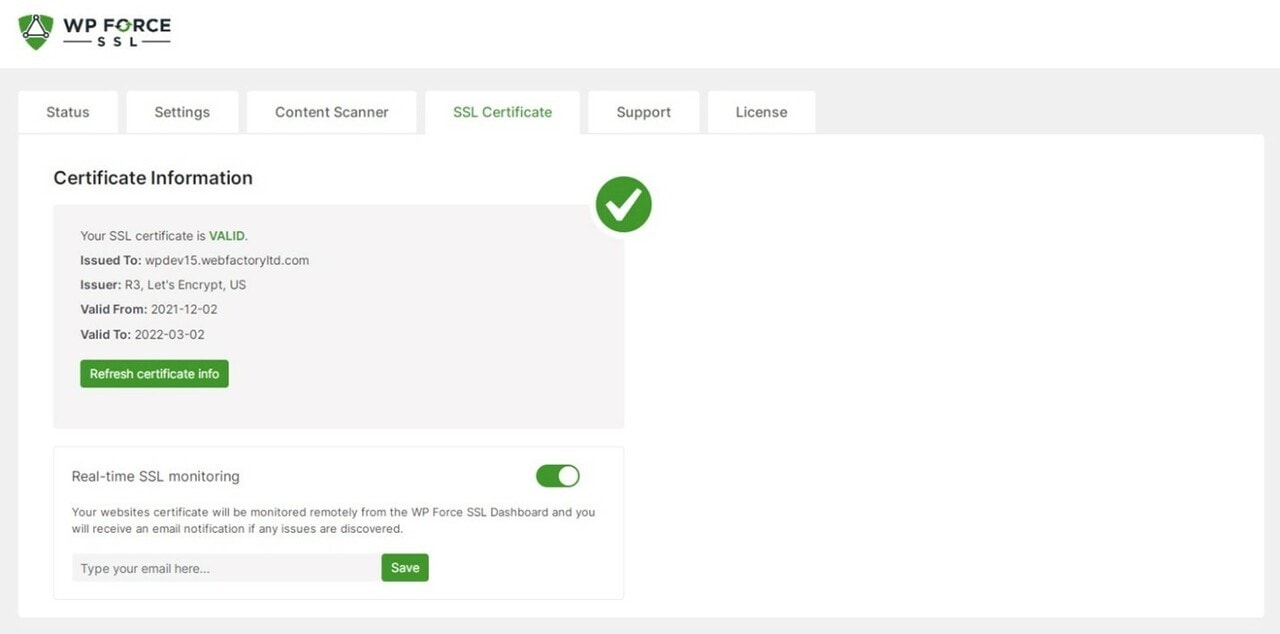
On this tab, you can find information about your SSL certificate, for example, if the certificate is valid, to whom it has been issued, who is the issuer, the validation date, etc. The “Refresh certificate info” button will give you the newest information about your certificates.
And if you hate looking up this information manually, the real-time SSL monitoring feature will work for you. WP Force SSL dashboard will automatically scan your certificates and notify you over email if there are any errors found. After enabling the Real-time SSL monitoring from the SSL Certificate tab, all the information will be available via your Dashboard, and this way, you can monitor all active certificates you have from one centralized location.
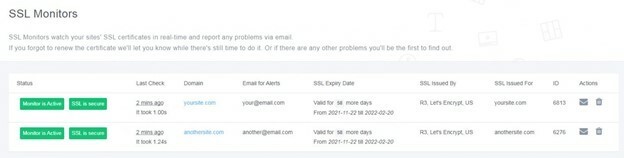
There is also an option to send a test email to check and confirm if all alerts work as intended. The following information is available: status, which shows if the monitor is working well and if the certificate is active; last check, the date of the last check; domain, which tells the domain name of the website for which the monitor is set up; email for alerts, the email address to which the alerts are sent; SSL expiry date, the date of certificate validation; SSL issued by, name of certificate authority who issued the certificate; SSL issued for, name of the registered website; ID, a unique number that represents the SSL monitor; Actions, testing the email or deleting the SSL monitor.
Content scanner
Since it is almost impossible to manually check every page on your site for mixed content, the provided Content Scanner does this job in minutes and provides an extensive report for you to avoid mixed content errors.
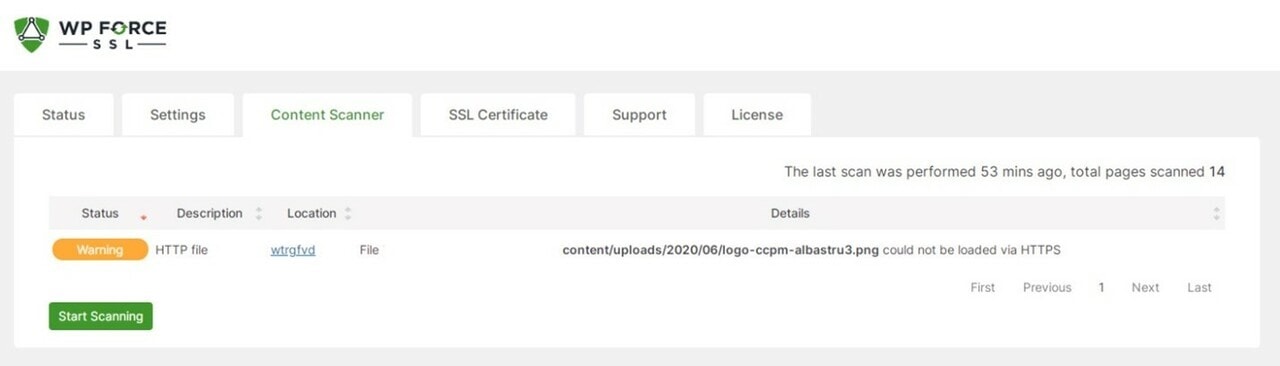
The Content Scanner allows users to quickly scan the entire website, and you can act upon the results by manually fixing content errors if you do not have enabled the option to automatically fix mixed content errors. Depending on the size of your content, the scanner can execute the work in a few seconds, and once the scan is completed, you will receive a status that shows what type of errors you are facing, a short description of the error, the location of the page or post where the error was found, and more details about the error.
Centralized dashboard
With the provided centralized Dashboard you can control all your purchases, licenses, sites, and SSL monitors from one single location. This will, in turn, save you a lot of time by you not having to go to different dashboards to collect information about all the pages and licenses. For agencies, this is especially useful and will save hours of work.
Activation of the dashboard is also pretty simple. After the purchase, two emails will be received. The first email confirms the payment, and the second email contains the information needed for accessing the dashboard. Following steps are required for setting up the dashboard:
- Opening the second email titled “Welcome aboard! Your WP Force SSL PRO account is ready!”
- Click on the “Password: set one up” link in the email
- In the newly opened tab, click on the “Get new password” button
- Open the link you received in the new email sent to your address
- Enter the new password, making sure it is strong and unique.
That is it; you are all set up. On this panel, you can create your license key, download the plugin, etc.
Conclusion
Having a valid SSL certificate does not guarantee your site is secure, and your site may not have the green lock in the browser address bar. There are many reasons why this can happen, and with WP Force SSL, you can find the cause of this and fix any issues that arise.
WP Force SSL plugin does not automatically modify your site settings. If anything requires permanent changes, a confirmation window will appear asking you to confirm the changes. All changes made “on the fly” are not permanent, and disabling the plugin will revert those changes.
By subscribing to the PRO version, you gain access to the 24/7 support that will help you with any inquiry you have. Pricing starts at $59 for a personal lifetime license that includes a license to one website. The next tier is $89 for a Team lifetime license that includes five sites license. Lastly, the Agency lifetime license costs $119 and includes a license to one hundred websites. More info about the pricing and everything else related to this plugin can be found on their official website.
If you want something that covers most of the basic features of creating and monitoring SSL certificates, then you can check out the free version of this plugin. It is important to know that a 7-day no-questions-asked refund policy is offered to all customers. Licenses can be reused multiple times; after you deactivate the license on a site, the license is put back to the license pool, and you can activate it on another website from there. Since all changes are made in admin, there are no changes to the frontend meaning nothing is loaded, added, or processed which prevents any slowdowns or performance hits on your website.