There are many off the shelf form plugins that you can purchase or download for free for WordPress from the plugin repository. However, I wanted to talk about a specific form plugin, Quform, and how I integrated it with Listify.
Now you may not currently have a Listify theme, and you may not even own Quform. And that’s okay. What I wanted to show you during this blog is how to use a form’s hooks to create some genuinely custom software.
 You see, for most forms that people use, there is one action. The form takes the contents of the form and sends it over to the website owner (yourself). This is what you would call a lead form. There may be some additional options. For example, the form could also have an autoresponder that would send the person filling out the form a confirmation email that the form has been received.
However, forms can be programmed to do much more than this. In my particular case, I had programmed the form to leave a review on a Listify directory based off nothing other than the user leaving a phone number.
Look For the Hook
With any form you want to work with, especially with Quform, you have to start looking for the hook. The hook is where you can ‘hook in’ your code. That is the place where you want to add some custom code.
In my case, because I wanted the form to operate as a ‘Leave a Review’ form, so in other words, a user could leave a review only by entering the mobile number of the business along with some scales of how well the company did. This would then create a new ‘WP Job Manager Reviews’ instance (which is the plugin we were using to track reviews).
The hook in this case was :
function my_post_validate($form)

{

// code to hook into the form here

}
add_action('iphorm_post_validate', 'my_post_validate');
In this particular case: every time a Quform was submitted, the ‘iphorm_post_validate’ hook would run. It would pass the ‘my_post_validate’ (in this case), the variable of $form, which would contain all the data from the form.
From there, whatever you wanted to do with the data was only limited by your imagination!
You can see how this pretty much allows you, with the help of Quform, to create an application with forms that will enable you to do anything you want with the form contents submitted.
Getting the Value From the Form to Do Your Magic
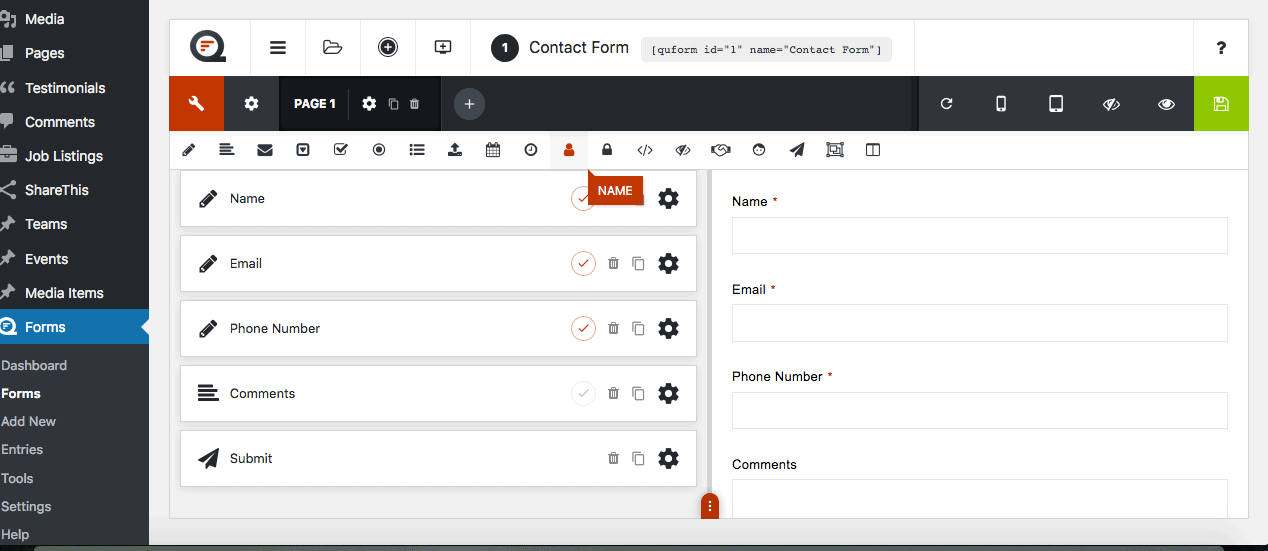
Once inside the function which is triggered by the hook, we now need access to the data in our form. In the new Quform interface, you can find this in the ‘Advanced’ tab of a field’s settings, you can see how this is done in the video below:
In the video above, you can see that the ID of this element is 1_3. This is important as this is what we will need in our next step.
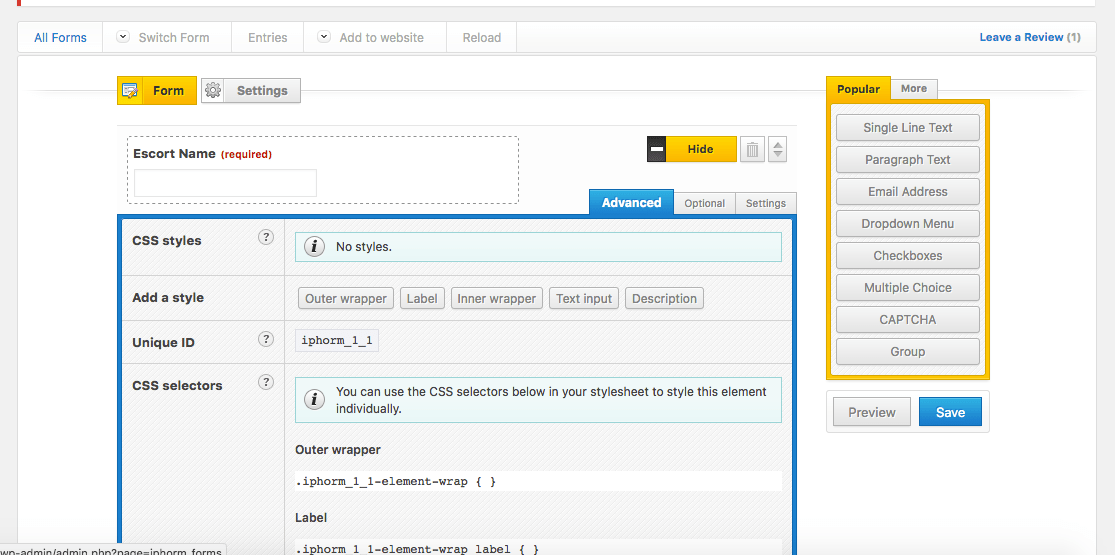
Note: since Quform has gone through an update to their interface, I cannot say with 100% certainty that this code will work since I have not tried it on the new interface. However, it should, as it was just a UI upgrade. Here is what Qufrom interface looked like before:
Old Interface:
New Interface:
 Anyway using the example above of ‘1_3’ as the id of the form element – to get that data in the code use the following:
$name = $form->getValue('iphorm_1_3');
So now you have the name in the $name element and can do whatever you like.
Simple!
Searching for the Correct Listing to Leave a Review
Since in my case, I need to find a listing that has the phone number that the user left on the form and to leave that listing a review I use the following code:
$phone = $form->getValue('iphorm_1_7');
$args = array(
'post_type' => 'job_listing',
'meta_query' => array(
array(
'key' => '_phone',
'value' => $phone
)
)
);
$my_query = new WP_Query( $args );
if( $my_query->have_posts() ) {
while( $my_query->have_posts() ) {
$my_query->the_post();
$escort_id = get_the_ID();
$timestamp = (new \DateTime())->format('Ymd');
update_post_meta($escort_id, 'date_reviewed', $timestamp);
// This is to ensure that the Most Recent Reviews function works
/*$timestamp = (new \DateTime())->format('Y-m-d H:i:s');
update_post_meta($escort_id, '_date_reviewed', $timestamp);*/
$wpdb->insert('wp_comments', array(
'comment_post_ID' => $escort_id,
'comment_author' => $name,
'comment_author_email' => 'a.greenspan@gmail.com',
'comment_date' => $comment_date,
'comment_date_gmt' => $comment_date,
'comment_content' => $comment,
'comment_approved' => 1,
'comment_parent' => 0,
'user_id' => 0
));
$comment_id = $wpdb->insert_id;
$wpdb->insert('wp_commentmeta', array(
'comment_id' => $comment_id,
'meta_key' => 'photo_type',
'meta_value' => $photo_type
));
$wpdb->insert('wp_commentmeta', array(
'comment_id' => $comment_id,
'meta_key' => 'star-rating-0',
'meta_value' => $looks
));
$wpdb->insert('wp_commentmeta', array(
'comment_id' => $comment_id,
'meta_key' => 'star-rating-1',
'meta_value' => $service
));
$wpdb->insert('wp_commentmeta', array(
'comment_id' => $comment_id,
'meta_key' => 'review_average',
'meta_value' => $review_average
));
$wpdb->insert('wp_commentmeta', array(
'comment_id' => $comment_id,
'meta_key' => 'review_categories',
'meta_value' => 'a:2:{i:0;s:14:"Overall Looks
";i:1;s:15:"Overall Service";}'
));
$wpjmr = WP_Job_Manager_Reviews::instance();
//$wpjmr->review->save_rating_average_post_meta( $comment_id );
$avg = get_avg_rating($escort_id);
update_post_meta($escort_id, '_average_rating', $avg);
//wpjmr_update_reviews_average( $escort_id );
delete_transient( 'wpjmr_reviews_' . $escort_id, 7, 12 * HOUR_IN_SECONDS );
Since some of this code may not be relevant let me break every part down:
$phone = $form->getValue('iphorm_1_7');
$args = array(
'post_type' => 'job_listing',
'meta_query' => array(
array(
'key' => '_phone',
'value' => $phone
)
)
);
Here I get the value of the phone and then query the database for any listings that have the ‘_phone’ custom field that matches. A tip, in this case, is to use the number field in Quform. You should be able to set it up so that the user can’t add any spaces to the field so you don’t have to do a bunch of complicated pattern matching since all they can do is enter the mobile number and no spaces or special characters.
The next step is to see if there are any results returned (it should come back with a maximum of one result since any business can only have one unique number). After that, there is code to add the review to that listing. Note that in this particular case the review has a number of variables like ‘Looks’ etc. This is for a model site, so don’t worry too much about all the extra code.
So that is how to easily integrate Quform with a Listify site to allow users to post reviews through a form to any business.