Your website is the best-equipped channel to facilitate your communication with your customers and improve their engagement with your content. Firstly, it is the space where you can present your product or service and communicate all its qualities to your users in detail. Secondly, there are numerous ways to use it to improve the correspondence between the customers on one and you on the other side.
Adding a tailored form – permanent or temporary – is among the safest and cleanest ways you can smoothen the communication process.
The first type of form that will come to your mind is the contact form. It is highly likely that looking for a way to introduce this exact feature to your site is what brought you to this article. However, there are numerous other functions a form can fulfill in a WordPress website. Some of them might be just what your site needed, so here’s a quick list of the most prominent form types. Then, we will show you how to create and customize one of them in your WordPress site.
All the Ways to Use a Form in WordPress
From contact to donation forms, we have compiled a short list of all the ways in which you can utilize forms in WordPress.
- Contact Forms – They are a great way to provide your site visitors with a handy communication channel and weed out spammers at the same time. Namely, filling out a contact form is done in a few clicks, which will retain those impatient visitors who expect instant solutions. Also, adding a required and easily verified field, such as email address, will prevent the spammers from sending you irrelevant or dangerous content.
- Newsletter Application – If you have frequent updates to share with your customers, it would be smart to add a simple but effective newsletter application form. Incorporating a WordPress newsletter plugin can streamline this process, allowing for easy sign-ups and efficient distribution of your updates. This way, you can put all news into one convenient newsletter and keep your clients engaged with your activities and offer. This also adds a personal touch and makes your customers feel appreciated, which in turn improves their loyalty.
- Purchase Forms – In case you decide to have some form of sale option on your site, purchase forms are just something you’ll need to provide to facilitate the sale process. In addition, they will also speed up the whole order placement process, which is especially important if you are running an online store and handle numerous products and daily purchases.
 Booking Forms – Similarly to the previous type, booking forms are also there to make your business operations quicker and simpler for both you and your customer. This is especially the case if you offer live events or something like accommodation, or basically anything else that needs to be pre-arranged. The improved booking efficiency is also likely to enhance customer satisfaction, and we all want that.
- Review Forms – The best advertisement is the recommendation from a satisfied customer. Hence, make sure you allow your clients to leave a review directly on your website. This way, the new site visitors will have all the info in one place, while it will make your website look more reliable. As the number of positive reviews increases over time, it will further improve your image and help grow your business.
- Donation Form – If you are running a charity or provide your services on the basis of voluntary financial contributions, this type of form would come in handy. First of all, you would provide your donors with a convenient donation channel through the website. This means that they will also have less time to change their mind as they make their switch to their online banking service.
- Job Applications – If you are running any sort of company that is expanding and, consequently, needs more workforce, it is smart to make job applications available through the website. This will make applying for the job much more efficient, primarily because you will have full access to the form questions, layout, and design. Similarly, the candidates will have all the info about the company and the vacant post in one place.
- Quizzes, Polls, and Similar – These types of forms are, above all, engaging. They can have several purposes, from collecting contact info to analyzing your users’ likes and dislikes. Both types of customer data can hugely improve the success of your future marketing efforts.
How to Create a Form
The first way to add a form to your website is to write it in code. For developers, this will be a minor task. However, if you are a site owner who doesn’t really know much – or anything – about writing code, it will be a truly hard and time-consuming way to equip your website with the desired form. Of course, there is always an easier way.
As with almost all additional features that make your website functional and professional-looking, the solution lies in the WordPress plugin repository. This is the quick and high-quality fix to which even many developers resort.
One of the best plugins for creating various tailored forms is Forminator. On top of its user-friendliness and functionality, it’s also free. So, let’s first get a glimpse of the Forminator’s general features and then go through the steps to perfect WordPress forms.
Forminator – General Info
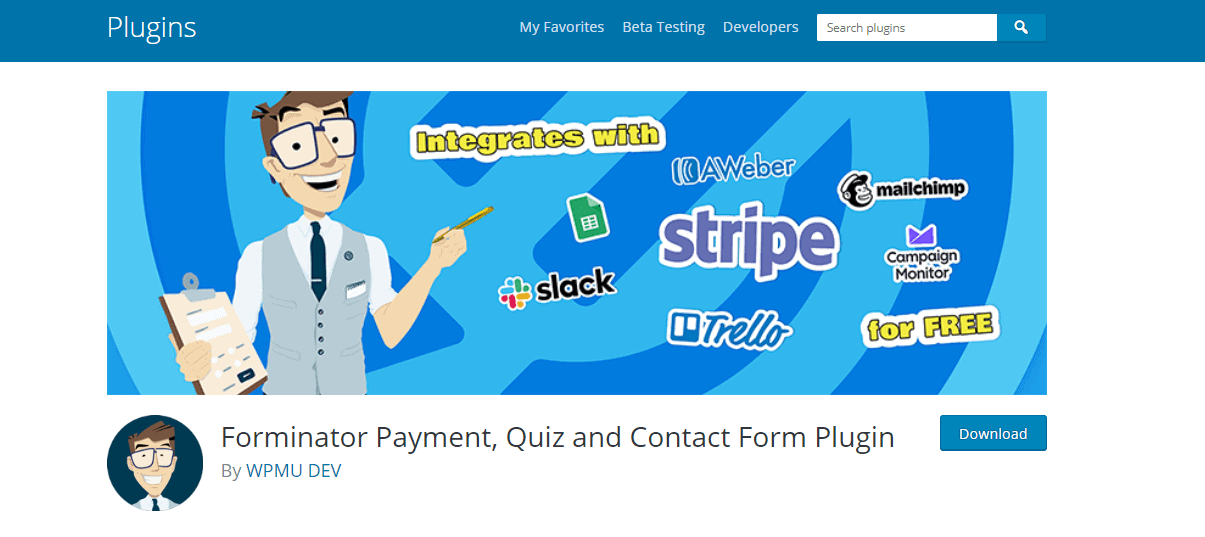 Forminator has been available for around a year now. Still, even though it’s a fairly new plugin on the market, it has managed to attract over 60,000 active users. It is compatible with the WordPress versions 4.6 and later, and when it comes to its compatibility with PHP, it starts with version 5.2.4.
This plugin has a stable five-star rating on WordPress, and the team behind it is quite efficient and has so far fixed the majority of reported problems. On top of this, Forminator is available for free for all users.
Forminator and the Steps to the Perfect Form
Moving on to the forms and the process of their creation, Forminator has it all – contact forms, review widgets, registration forms, order and payment forms, which are linked to PayPal and Stripe. Then there are interactive polls, quizzes, as well as “get a quote” estimators.
Building any of the featured form types is made easy by the plugin’s drag-and-drop interface. This means no coding, just several easy-to-follow steps to the form you had in mind.
Installation
First things first. You will need to install Forminator into your WordPress account before using it. This is done just like with any other plugin:
- Go to your Dashboard, and find Plugins option in your left-hand side menu;
- Click on “Add New” which will open the WordPress plugin repository;
- Go to the search bar in the upper right corner and type in “Forminator”
- The plugin we want should be the first result of the search, and you need to click on the “Install Now” button in the upper-right part of the plugin card;
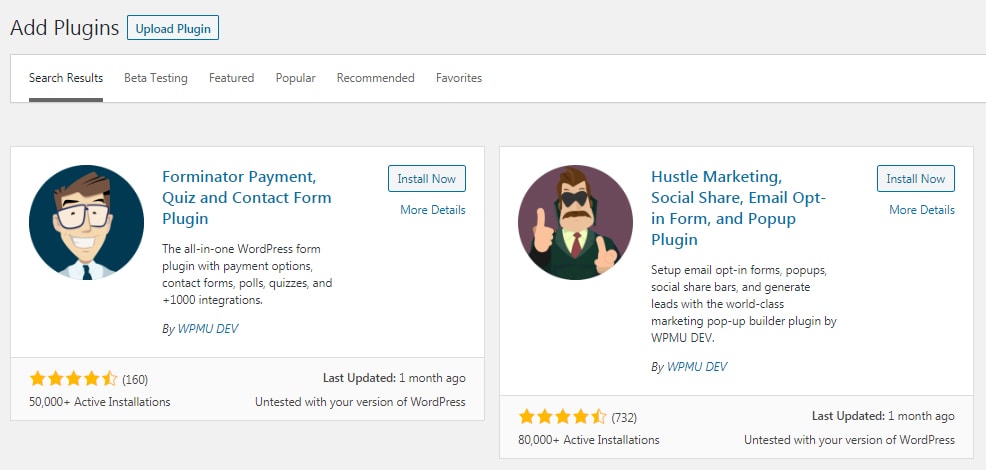
- Once it finishes installing, the same button will become the “Activate” button, which you should click again;
- When it’s activated, it will automatically lead you to the list of your active plugins;
- To start working with Forminator, find it on the left-hand side menu of your WP account, and choose “Dashboard” from its menu.
Forminator Features and Form Creation
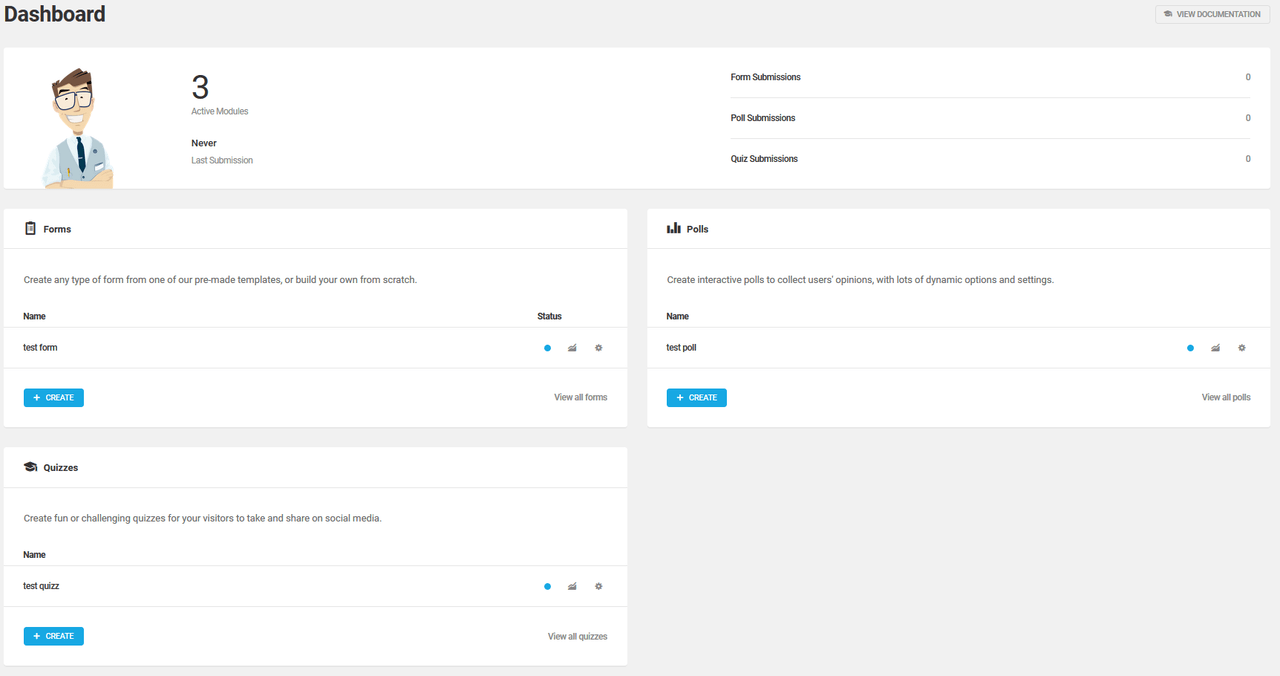
There are several options that you will be offered in the Forminator’s menu, and they are all different types of forms that you can create through this plugin. These are:
- Forms
- Polls
- Quizzes
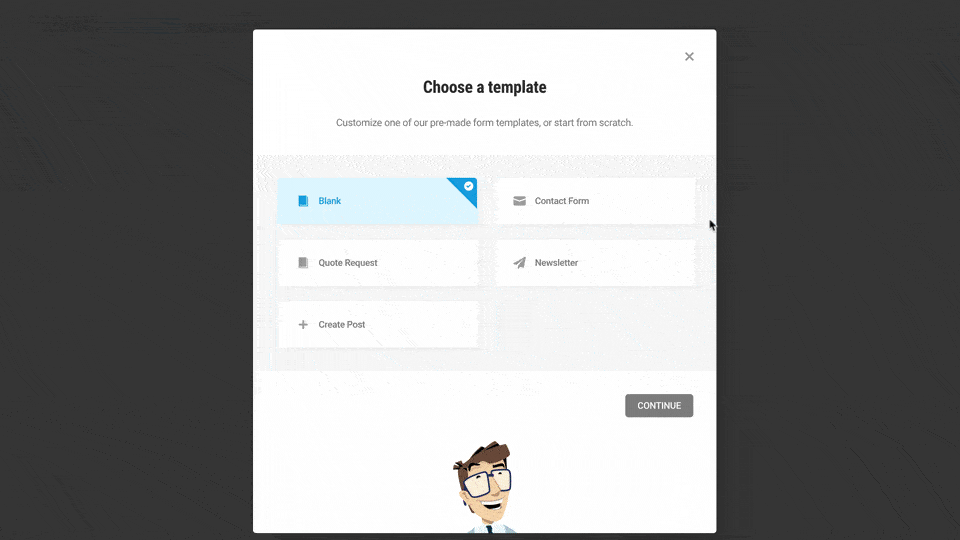
 Once you choose the type of form you need to create, you can start the customization. The editor for each of the form types will offer a slightly different range of settings. Still, the first screen will always offer you two choices: “Import” and “Create”. In case you have the finished form elsewhere, you can simply choose to import it. If, however, you need to create one, click the “Create” button and go through the settings to personalize it.
So, let’s move on to the creation process itself.
Forms
When you set out to create a form, you will be offered a choice between templates titled Blank, Quote Request, Contact Form, and Newsletter.
 We will proceed with our explanation on the example of a contact form since this is the most popular type of form Internet-wide. The second pop-up will ask you to give the name to your new form. Finally, you will be shown the editor with several tabs on the left side displaying the aspects of your form that you can edit. The majority of these sections are either the same or fairly similar in all three form types. This form category includes one additional tab on top of the mutual editing sections:
- Fields – This tab contains the default fields of a Forminator contact form. These are the fields for the name, email address, telephone number, and message.
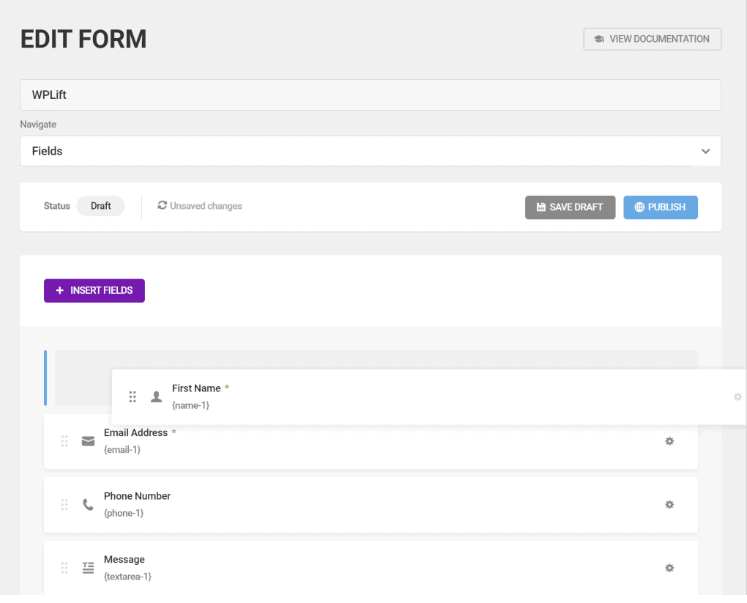 You can edit them by clicking on the dot on the right side of each field. A click on the “Edit Field” option will launch a pop-up window where you can find and manage all features of each filed. This includes whether filling in the field is obligatory, as well as the error message that will appear if the visitor fails to fill out all the obligatory fields.
This is where you also handle the fields or parts of the fields which you want to be prepopulated with certain data.
A validation option is available for the visitor’s email address, so you can be sure that you have the right contact info.
The drag-and-drop interface allows you to simply drag the fields into the order and position you want, even if you wish a couple of them to be in the same row.
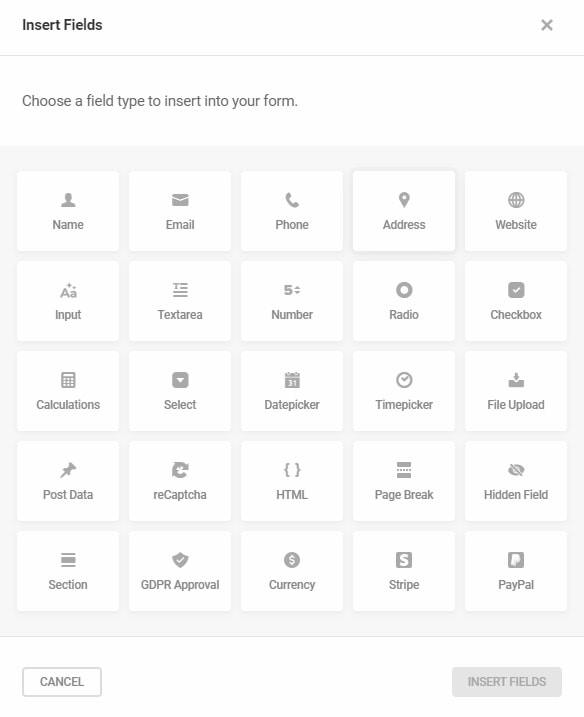
Of course, if you need more than these few default fields, there is a button titled “Insert Fields,” which gives you numerous options. From Address and Website to Checkboxes and Calculations. Each of these field types comes with a range of customization options that further adjust the form to your needs.
 Polls
Polls
Polls are a bit simpler. Once you choose to create a new poll, you will, again, see a pop-up that will ask you to give a name to your poll. There is also just one category-specific tab in addition to the regular ones.
- Details – This is where your questions and possible answers go. When it comes to questions, you will be able to add a description or an image to it. Also, you can edit the text on your poll’s submission button.
Quizzes
When you set out to create a quiz, you will first be offered a choice between two types available through Forminator: personality quiz and knowledge quiz.
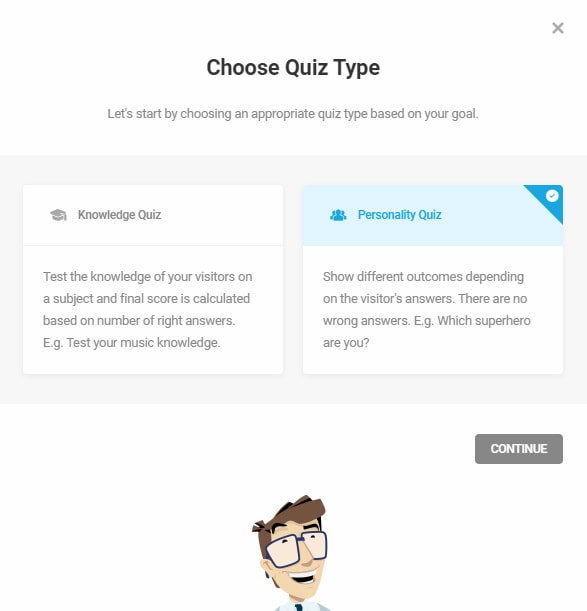 As a personality quiz is much more likely to attract your visitors’ attention, we will lead you through some of the settings included in this type of quiz.
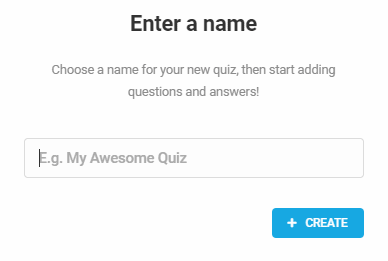
The next pop-up will ask you to name your quiz, just like with the two previous form types.
 Then, it will show you the editor with three unique sections besides the mutual ones.
- Intro – This is the first tab that automatically opens once you click the “Create” button on the quiz name pop-up. Here you can set some general features of the quiz, such as the quiz title, the featured image, and the description.
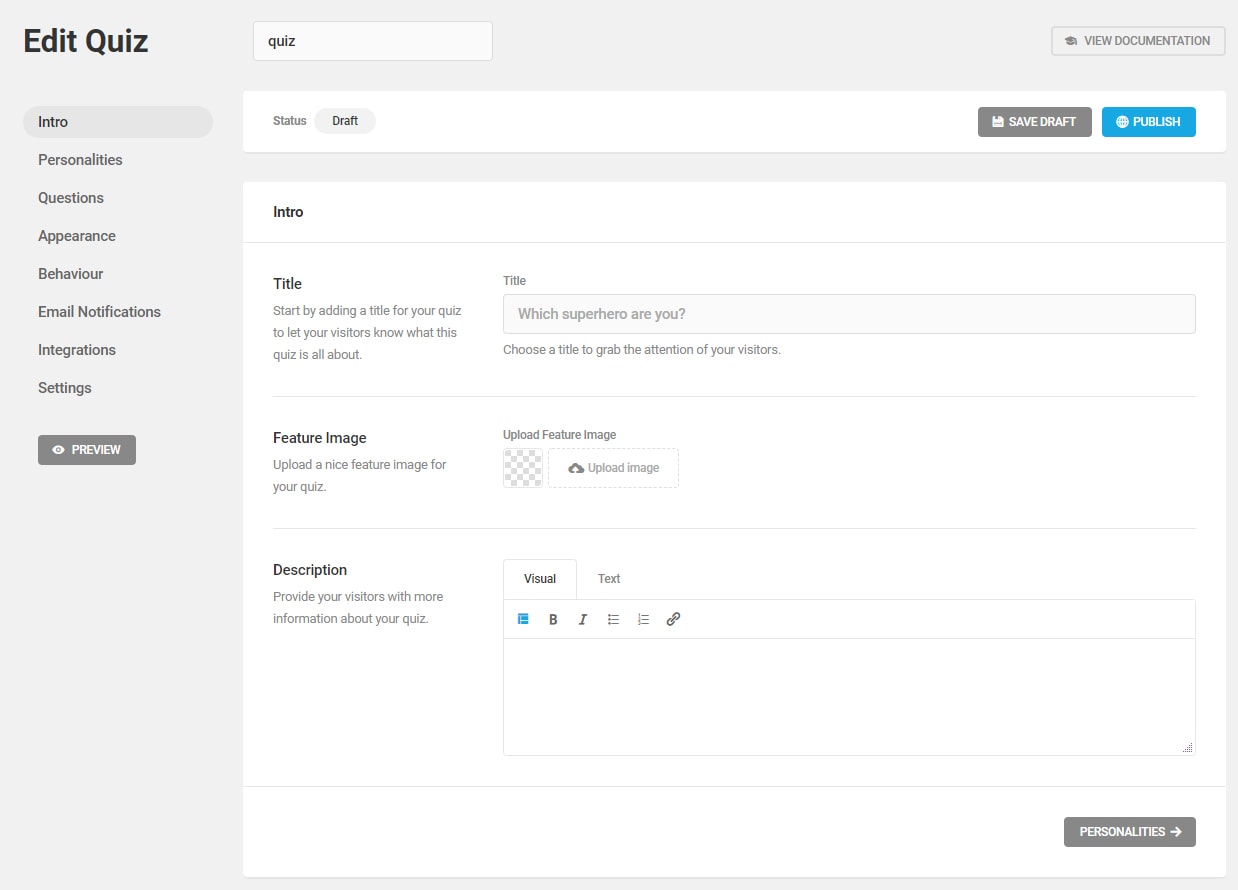 Personalities – They are easy to add. Just click the large “Add Personality” button each time you want to add a new personality. This will prompt a pop-up to appear with a few fields for you to fill out. Again, these fields are title, image, and description.
- Questions – Questions are as easy as personalities to add, but have somewhat lengthier – although simple – editing process. So, the question and the image fields are followed by the answer fields. The number of answer fields depends on the number of personalities you have added in the previous section. In other words, each answer needs to be linked with the dedicated personality which you simply choose from the provided drop-down menu. There is also a button to add an image for each answer if you feel that it is necessary for your quiz to be more effective and attractive. The “Submit” button is also available for alterations, i.e., you can change the phrase in it via this section.
Mutual Setting Options
Then, there are several more tabs that are pretty much the same or at least similar in all three form types.
NOTE: As the “Form” category has the largest number of setting options, we will go through its settings.
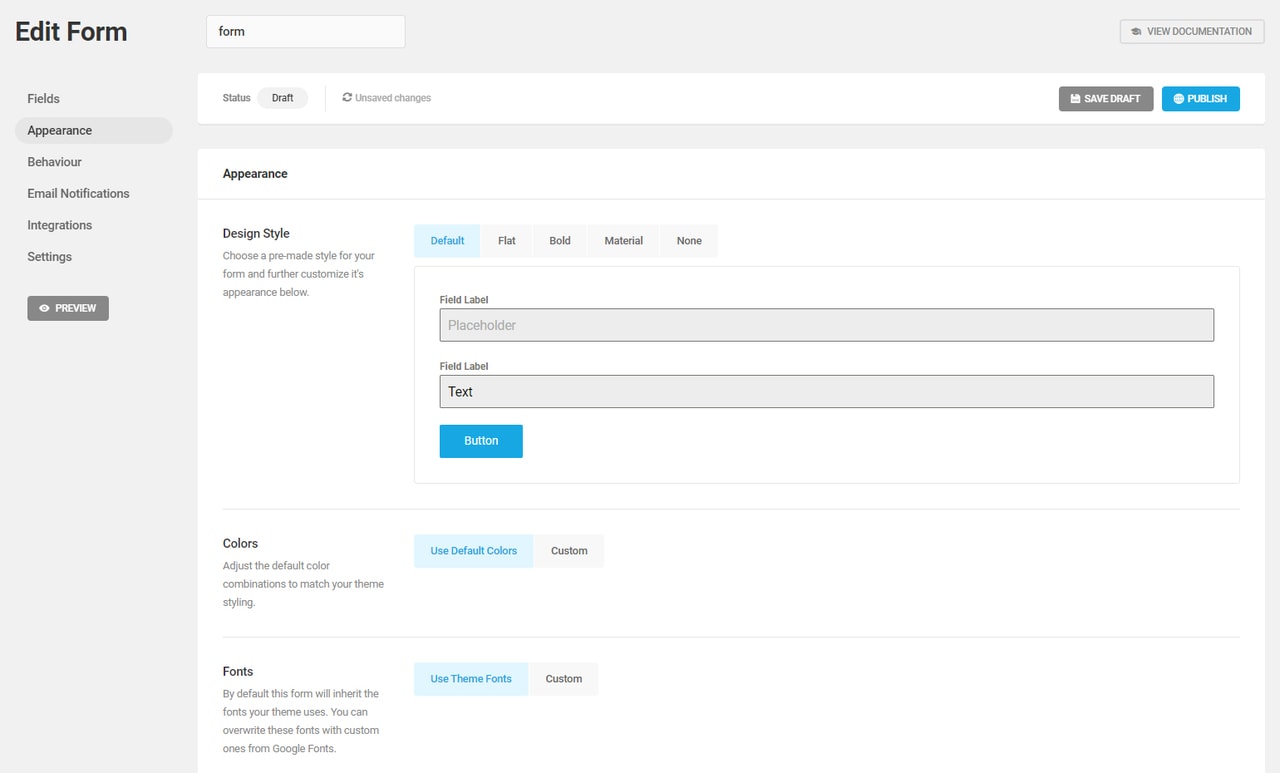
- Appearance – This is where you can edit the visuals for your form. There are a few styles you can choose for your fields. You can also change the color of the fields and buttons. The fonts and their colors are customizable for each type of field, as well as for buttons, drop-down lists, and basically anything else that appears on your form.
- Behaviour – Here you can adjust the way your form is sent and how the page behaves during and after the form’s sending. This means, for example, whether your page will reload when the visitor clicks the “Send” button. Also, you can decide what your visitors see after the form has been submitted. You can show a message of your choice, send them to some other page of your website, or just hide the form.
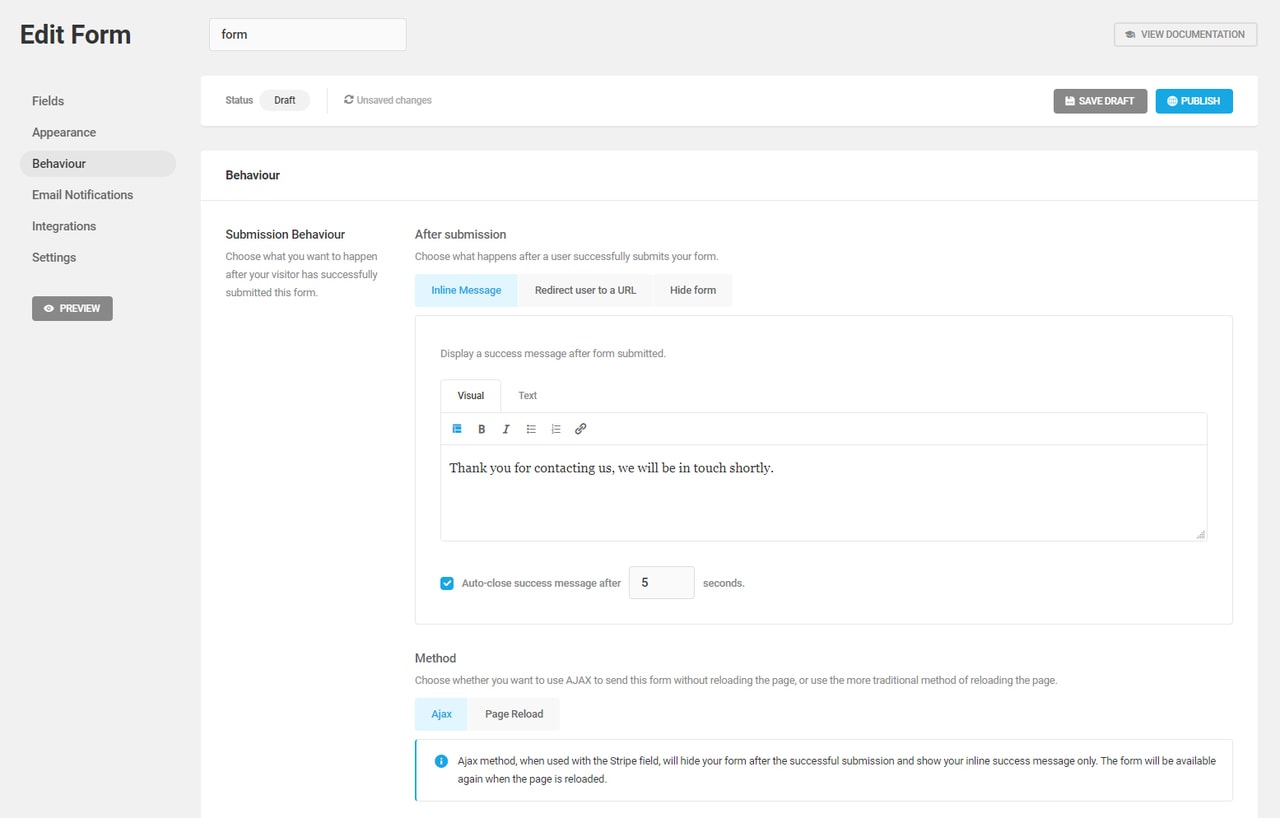 This tab also offers autofill options so that your logged-in users don’t have to fill out their data you already have in the system. In addition, there are several security settings, which allow you to limit the access to the form to only the logged-in users. Finally, you can set the lifespan of the form or certain elements on it.
- Email Notification – This section offers settings related to the notification messages regarding the visitors’ activity on the website. So, here is where you’ll input the email address of the person who will be handling the data collected through the form, so they can be notified about all the messages that the visitors are sending and the info they are sharing.
Additionally, in case you want your visitors to receive an email after they’ve filled out the form on your website, you can set it here just by clicking “Add Email Notification”. Then fill out the message, and under the tab “Recipients,” choose “Email” from the drop-down menu. This means that the visitor will receive your message in the inbox of the email address they have provided in the form itself.
- Integrations – This is where you’ll find multiple integration options for your form, with apps such as MailChimp, Trello, Slack, and other ones that make your communication easier.

- Settings – Managing data storage and privacy are what this tab is all about. In other words, this is where you can decide whether submissions are stored in your database, and for how long.
Publishing the Form
Once you finish editing your forms, you need to click the “Publish” button in the top right corner. This will launch another pop-up with a shortcode for your form.
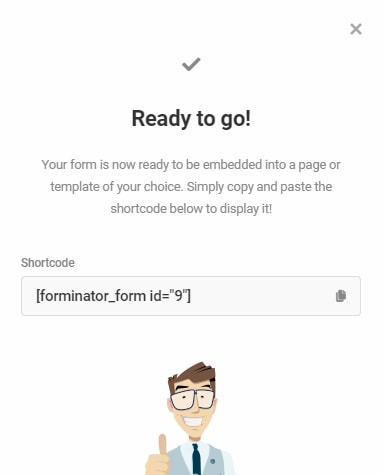 To create a page with your form, go to the “Page” tab on your WordPress dashboard and click “Add New.” When you see the blank page on your screen, type in the title, and then from the drop-down menu of the possible elements, choose “Shortcode” and paste your code into the bar that appears in the Gutenberg block. Now, when you click the “Publish” button, your website will get a new page with the form explicitly tailored to your needs.
Further Steps
From here, you can build a reliable scheme for managing different aspects of communication with your followers. It would be a great idea to sync Forminator with a mailing plugin as well as with a CRM one, i.e., if you still haven’t done so. This way, you will have a wholesome system in place, which will enable you to monitor and manage all communication with your audience.