If you’re using images on your WordPress site, you have probably tried out a photo gallery plugin. FooGallery is a good example of a WordPress gallery plugin and has been around for quite a few years. Just recently, it has expanded its offering with a new plan: FooGallery PRO Commerce.
This addition lets you take your galleries to the next level: it integrates with WooCommerce to allow you to sell items directly from your gallery. It’s simple to use and lets you make money with your gallery. What could be better?
In this article, we’re going to take a look at how FooGallery PRO Commerce works so that you can set up your own product gallery and start selling!
What is FooGallery PRO Commerce?
FooGallery, as you may already know, is a WordPress photo gallery plugin. With it, you can create beautiful galleries on your site in just a few short steps. Visitors to your site can then browse through your photos in the gallery. It’s a great way to curate and display your images.
But in the last few years, there has been a move towards selling online. Freelance photographers want to sell their photos without paying a commission to someone else. Artists, crafters, and shop owners are also moving towards the trend of setting up online shops.
For online entrepreneurs, having just a photo gallery is no longer efficient. This is where FooGallery PRO Commerce comes in. It takes your gallery and turns it into an online store!
While this is a premium plugin (in other words, you’ll need more than just the free version of FooGallery), it does offer a lot in the return value.
How It Works
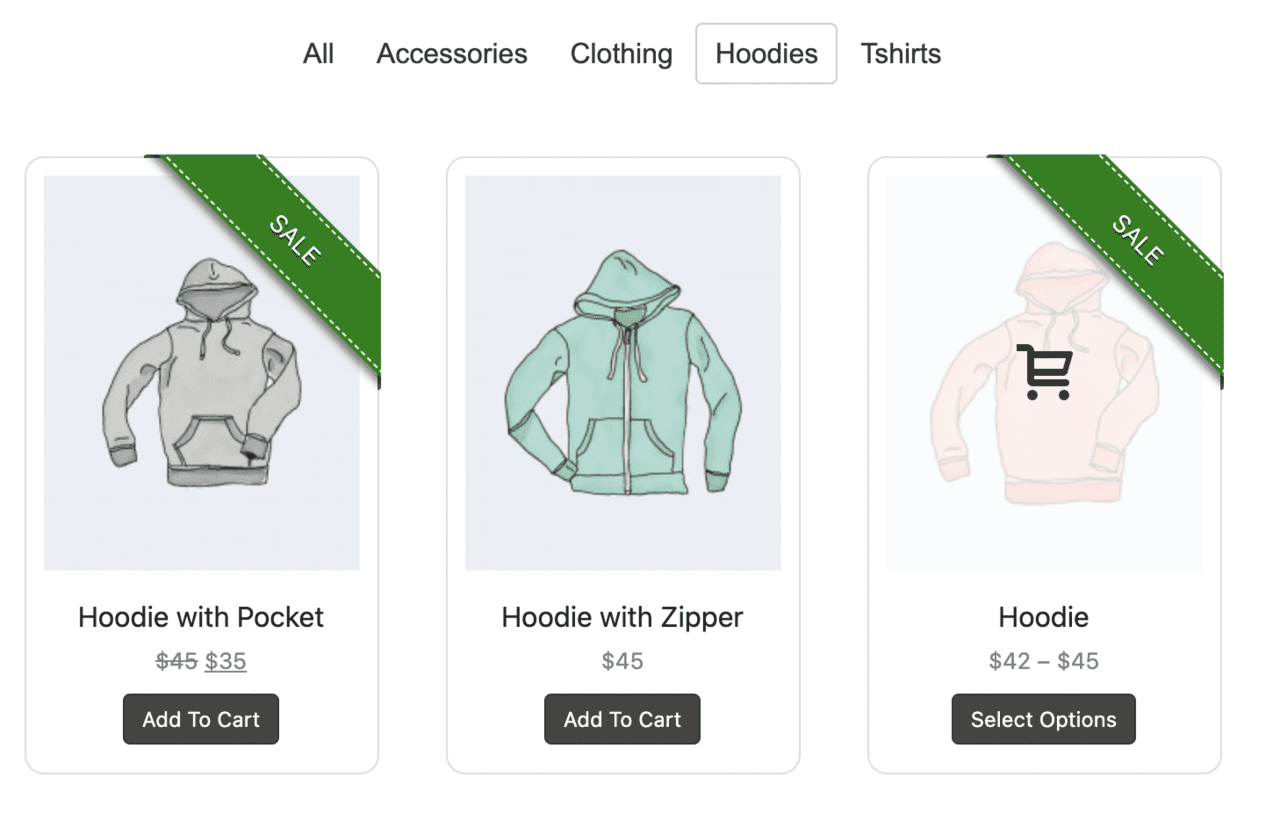
FooGallery PRO Commerce works by integrating with WooCommerce, allowing you to create galleries from the products you have set up. It picks up on product variations as well, so customers can choose a particular color or size, for example, without navigating away from the gallery. Plus, with Add to Cart buttons on gallery thumbnails and in the lightbox, customers can easily add products to their cart.
The PRO Commerce plan comes with a Product Gallery layout as well, making it really simple to set up a gallery from which you can sell your products. This gallery layout has filtering included by default so that customers can filter products according to their categories.
This FooGallery plan also has a unique feature: a Master Product. This is particularly useful if you’re selling photos that are all sold in the same sizes. With this feature, you can set up a single master product in WooCommerce, and link this to a gallery. All of the images in the gallery will then inherit the prices, variations, etc., from the master product. As you can imagine, this will save you loads of time if you already have existing galleries or lots of images.
Some of the other useful features included in FooGallery PRO Commerce include the Sale Ribbons, which you can use to highlight promotional items and Add to Cart buttons. Plus, this plan comes with right-click image protection and photo watermarking, so you can ensure that your full-size images are protected.
Setting Up Your Product Gallery
While some of the features, like photo watermarking and Sale Ribbons, can be used without WooCommerce, it is easiest to set up a product gallery using products you’ve set up in WooCommerce. Once you’ve loaded your products, it’s quick and easy to create a product gallery using FooGallery PRO Commerce.
Step 1: Install FooGallery PRO Commerce
You’ll first need to purchase the PRO Commerce license from FooGallery and install it on your site. Once it has been activated, you can begin creating your galleries.
Step 2: Add a Gallery
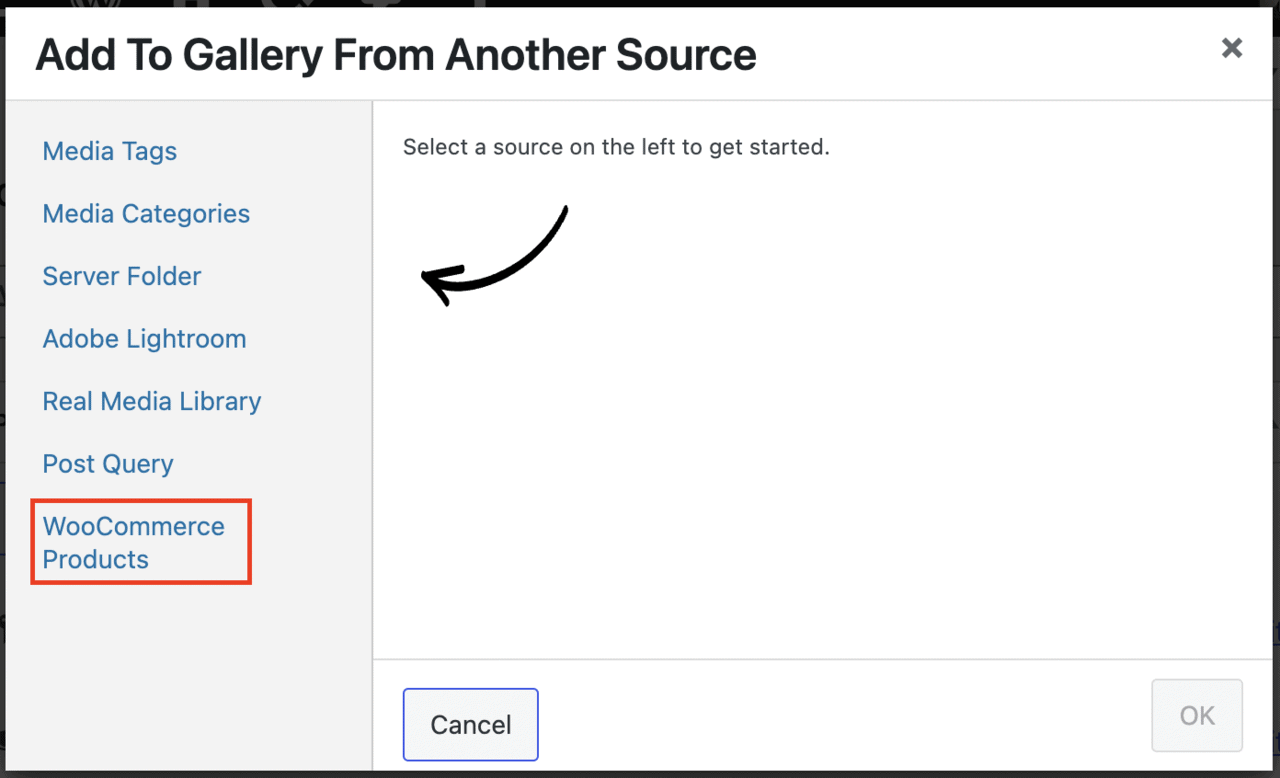
To get started, you’ll click on Add Gallery to create a new gallery for your WooCommerce products. On the new gallery page, you can add your media. (As mentioned, you can add products manually, but this can be more time-consuming.)
You’ll see the option to Add From Another Source. Click on this, and select WooCommerce Products in the next panel.
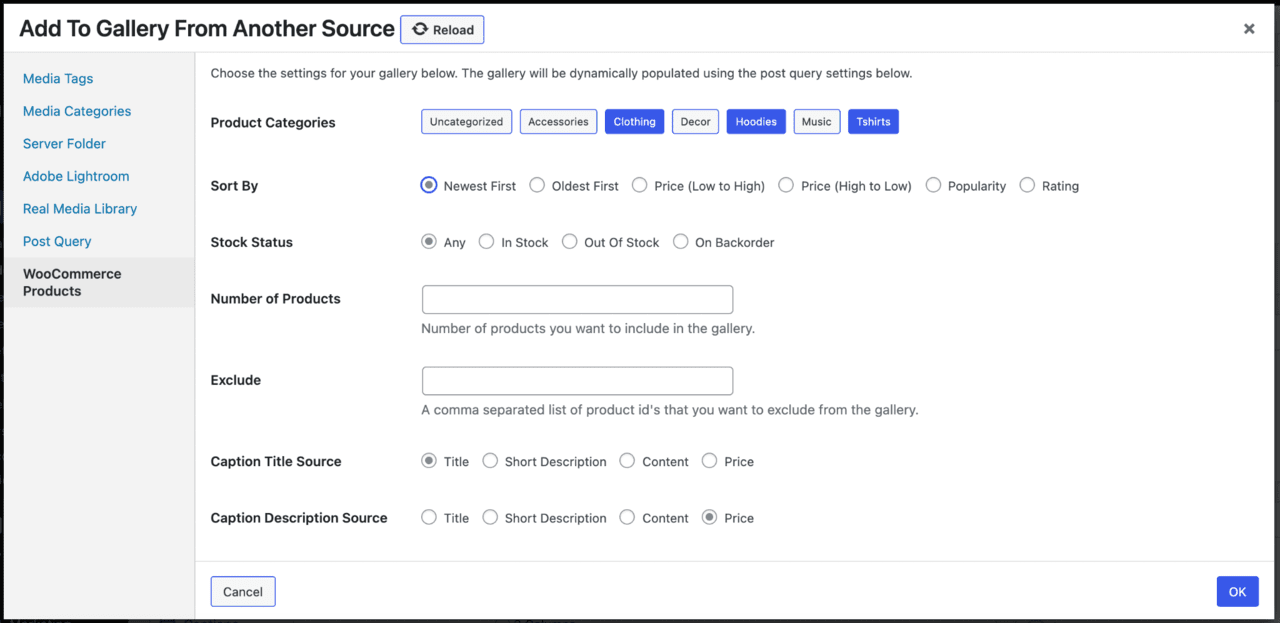
You can now select the categories you would like to display, along with other factors such as price, title, number of products, etc.
Step 3: Set up your Product Gallery
Once you have selected the items that you want to display from WooCommerce, you can create your product gallery. To make this as simple as possible, FooGallery PRO Commerce includes a product gallery template. Select this from the drop-down list of gallery layouts, and you’re good to go.
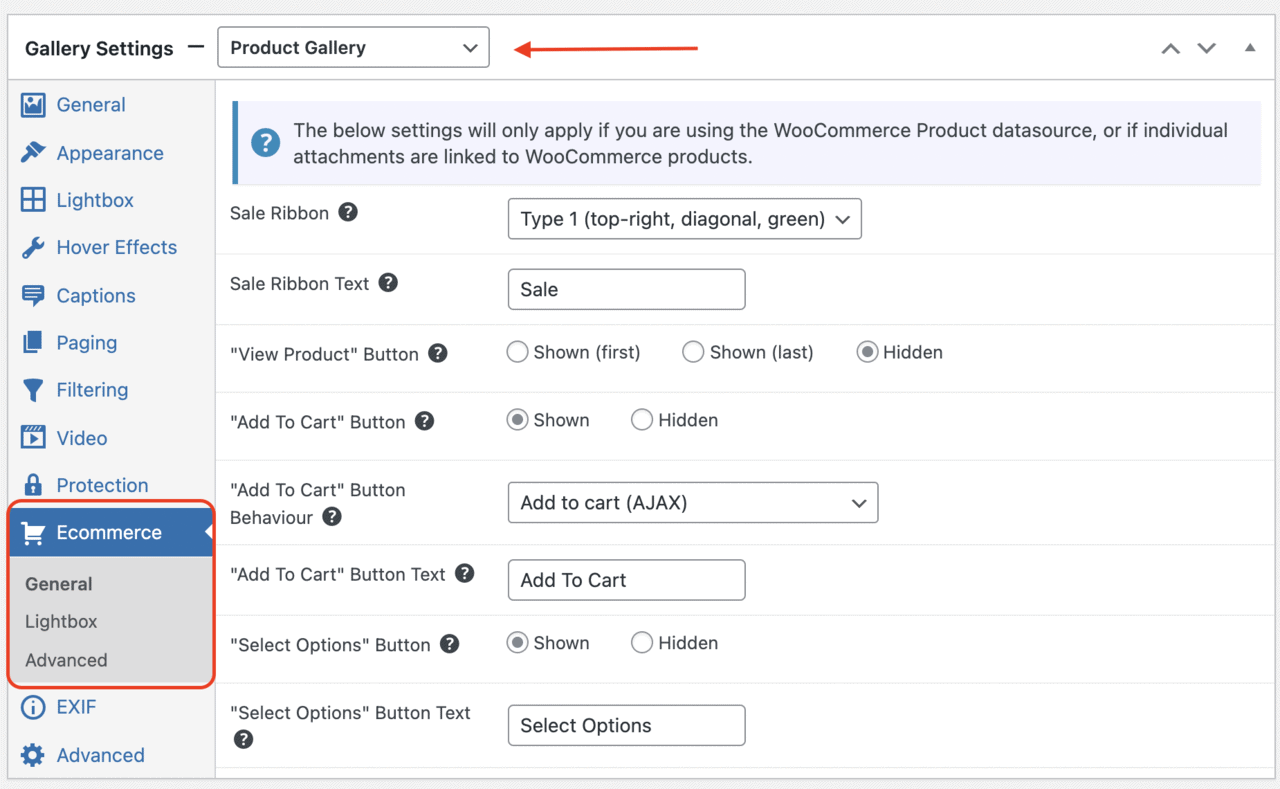
As you’ll see, Add to Cart buttons, category filters, and sale ribbons are already set up for you with this layout. All you need to do is tweak and customize the settings to suit your website. For example, you can change the wording for the buttons, select a different Sale Ribbon, or change some of the display options in the lightbox.
Step 4: Display your Gallery
When you’ve finished styling your gallery, all that’s left to do is display it on your site. You can use the FooGallery block in the Gutenberg editor or the gallery shortcode to do this.
Final Thoughts
Setting up a product gallery is simple to do, and if you’ve already loaded all of your WooCommerce products, it shouldn’t take you long at all.
If you’re using the Master Product to sell photos, then it can take a few minutes to set this up. But it can save you a lot of time because you don’t have to set up each photo as an individual product. You can find out more about using the master product on the FooGallery website.
So, whether you’re looking to turn your WordPress site into a revenue-generating machine, or you want to take your business online, this gallery offers you a way to make your products look amazing while bringing in sales. With all of the features that come with FooGallery PRO Commerce, you’ll be selling items from your WordPress gallery in no time at all.