Learning how to add the Facebook pixel to your WordPress site is the very first step to take in every Facebook marketing journey. Even Facebook itself would begin targeting your browser with ads – announcing the benefits of advising on the social media network – the moment you start researching on Facebook Pixel.
Aside from having an advertising goal, proactively engaging with your audience, and many other steps for an effective Facebook marketing strategy, you need a tool to track and analyze your results.
Now, this may sound like what one could achieve with UTM parameters, but it’s sincerely not.
Activating the Facebook pixel on your website during Facebook marketing campaigns is not only important to you but Facebook. The tool allows Facebook to track your consumers’ behavior on your website, making it crucial for profitable campaigns if you are really up for an advertising deal with the social media giant.
In case you need some clarifications on what Facebook pixel is, let’s first clear any doubts about the subject before jumping into the various steps on how to add the Facebook Pixel on a WordPress site.
What Facebook pixel means
It’s easy to think that Facebook pixel meaning has something to do with displaying images due to the word ‘pixel’. Well, that’s not. The Facebook pixel refers to a snippet of JavaScript code for tracking visitors’ activities on your website. The code works by simply triggering a group of functions each time your visitors take a trackable action on your website. The word action means events while trackable refer to conversions.
In a nutshell, the Facebook pixel is a piece of JavaScript code you need to place in the backend of your website for tracking your conversions while running Facebook ads.
Tracked conversions are monitored through the Facebook Analytics dashboard and Facebook Ads Manager for a proper appraisal of the ads’ effectiveness.
How to add the Facebook pixel to a WordPress site
You could embed the Facebook pixel manually to your website header or leverage a plugin that would require you to supply just the pixel ID. However, before you could use any of the plugins for adding a Facebook pixel to a WordPress, you first need to create the pixel on your Facebook ads manager. Based on the new requirements for setting up a pixel, advertisers must first create a Facebook business manager account. Yes, ads are not better managed on your regular Facebook page but a special advertising Facebook page.
If you have never advertised before on Facebook, then it’s very likely that you don’t have an ad account. Hence, you don’t have a pixel yet. But don’t worry, the entire process will be covered in this Facebook pixel tutorial. However, if you have already created a Facebook pixel, you want to skip the following steps and move over to your preferred method of adding a Facebook pixel to your WordPress site right after these steps.
Step 1: Create a Facebook business manager account
An ad account is actually the platform through which you can create and track ad performance. On your regular Facebook page, click on the dropdown button at the top-right corner of your account and select advertise on Facebook. This should open to the Facebook ad page where you can create an account for your business and access all the Facebook advertising features. Alternatively, you want to head over to business.facebook.com and set up your account. Make sure to verify your business email (if applicable) before moving on to adding the Facebook pixel to your WordPress site.
Step 2: Create a Facebook pixel
Click on the Business Manager Menu icon at the top-left corner of the Facebook business manager page. And click on pixels under the event manager in the Measure & Report column.
![]()
![]() This will load the pixel page where you will click on the green create pixel button to create the pixel. A pop-up menu would request that you name your pixel and add a website for the pixel. You want to fill out the form and include your business website address where you want to add the pixel in the URL field.
This will load the pixel page where you will click on the green create pixel button to create the pixel. A pop-up menu would request that you name your pixel and add a website for the pixel. You want to fill out the form and include your business website address where you want to add the pixel in the URL field.
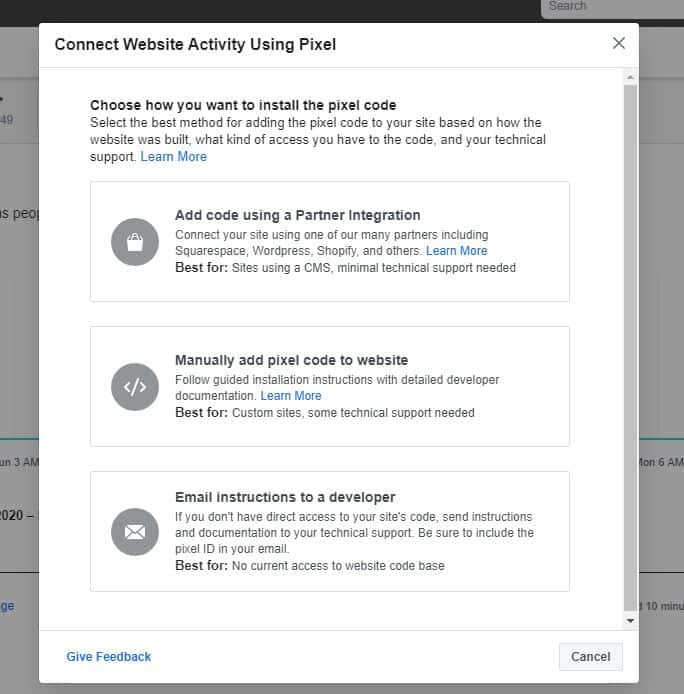 If you want to add the pixel code using a partner integration, go ahead and click on the first option in the dialog box asking for how you want to install the pixel code. It could’ve been easier to choose WordPress for automatic integration using the add code using a partner option, but this fails most of the time.
 Step 3: Add the Facebook pixel
If the first option (add pixel code using a partner integration) loads just fine, then you want to select WordPress from the list of partners.
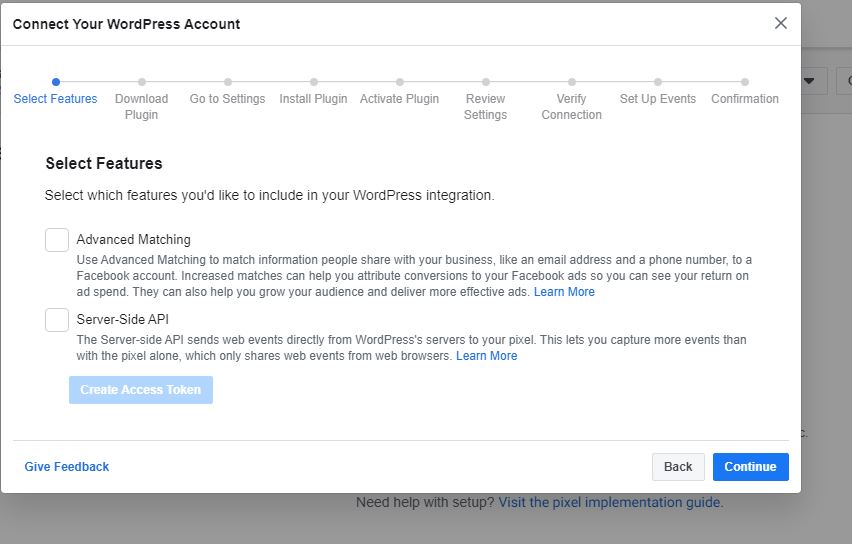
This will request that you select other features to include in your WordPress integration; otherwise, click on continue and download the Facebook pixel extension on the next page.
Install the plugin following the steps provided by Facebook if you’re not familiar with plugin installation in WordPress.
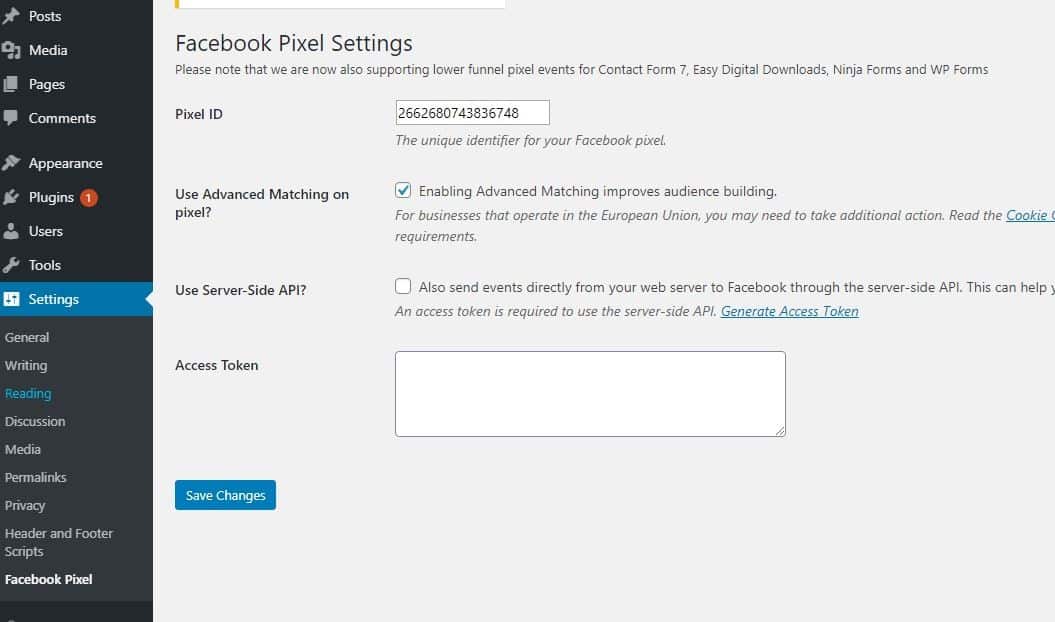
 Activate the plugin after the installation and go to the plugin settings (click on setting > Facebook Pixel). Enter your pixel ID and save the changes. That’s all. However, you want to check any of the procedures for adding the Facebook pixel below if the automatic integration procedure fails.
 Manually add a Facebook pixel to a WordPress site
You want to choose the manually add pixel code to website if the partner integration option fails to load. This should display the Facebook pixel tracking code you want to embed on your website.
There are several methods available for adding the Facebook pixel tracking code manually to your site. What you want to achieve is to have the code in the backend of your WordPress site header. But it’s not ideal to directly head over to your theme files and begin to edit your website header. This could break your site if anything goes wrong.
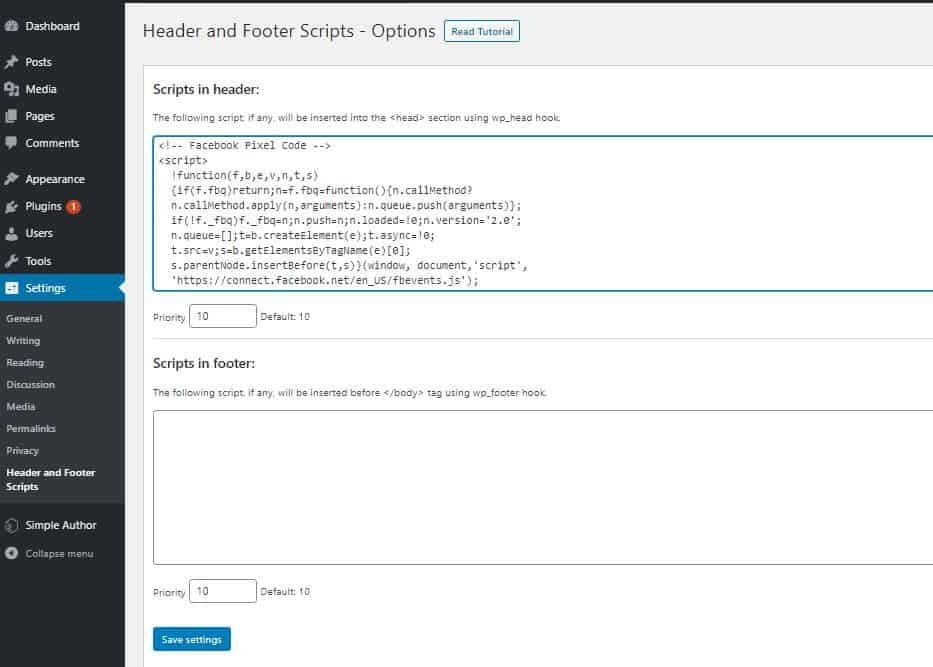
It’s recommended that you use a plugin for including scripts to a WordPress site such as header and footer scripts. To install the plugin, from your WordPress admin dashboard, click on Plugins > Add New and search for header and footer scripts in the WordPress plugin repository. Install and activate the plugin. On your WordPress dashboard, click on the settings > header and footer script. Copy the JavaScript snippet provided by Facebook and paste it in the header section of the plugin, save the changes. That’s all for this procedure.
If you need more flexibility in hosting your code, use Woody Code Snippets.
Using a plugin to add a Facebook pixel to a WordPress site
If you are not comfortable with the manual setup procedure of copying the entire code to your website header, then you should consider another procedure that lets you use the official Facebook pixel plugin.
After selecting the manually add Facebook pixel code to the website, copy only the pixel ID to your clipboard and go to your WordPress dashboard. Your pixel ID can also be found at the tail of the page’s URL. Click on Plugins > Add New and search for the Facebook pixel in the WordPress plugin repository. Install the official Facebook pixel plugin by Facebook, activate, and enter your pixel ID in the plugin setting page.
How to test that the Facebook pixel is working on your website
Though Facebook would send a notification to your business manager dashboard once you connect the pixel to your site, there are other means to find out if your website is being accessed by Facebook pixel.
The two methods are through your browsers developer tools or the use of a chrome extension: Facebook pixel helper. For the latter method, which is much easier, you are only required to install the pixel extension on your Chrome browser and visit the website using the browser. The Facebook pixel helper icon at the top right corner of your browser would turn blue as soon as your website loads if the Facebook pixel is properly added to your WordPress site.
Set up the Facebook pixel events
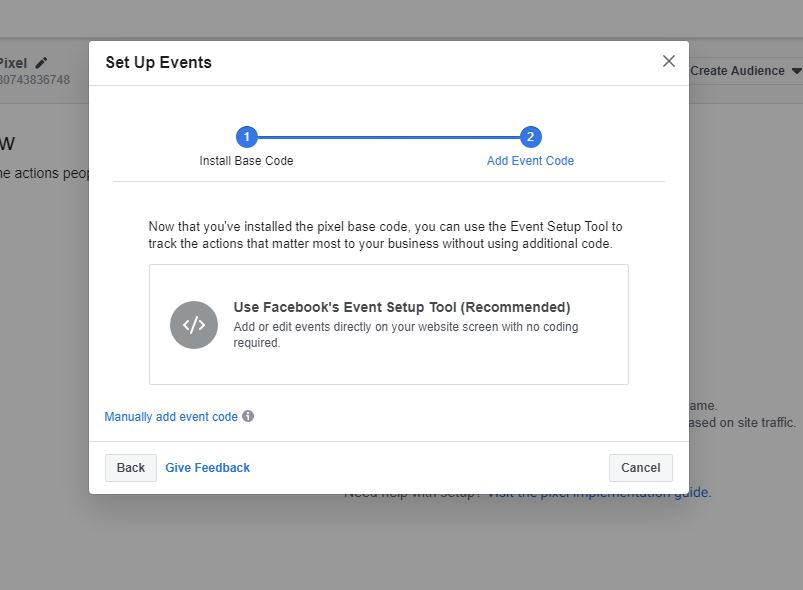
With the pixel successfully added to your WordPress website, the next step is to add the events you wish to monitor to the pixel. Click on the use Facebook’s event setup tool link at the pop-up window on your Facebook event manager page.
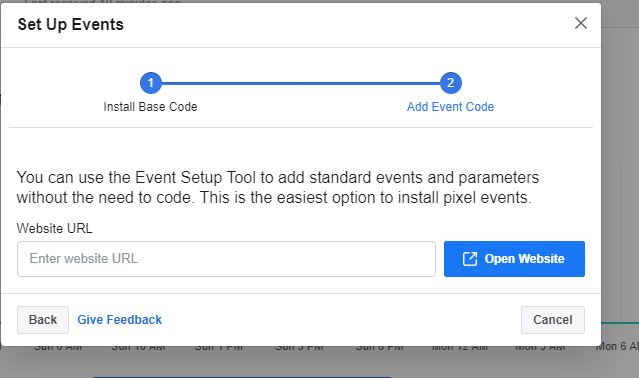
 Enter the specific URL of your website where you want to monitor and click on the open website button. This will load the page on another window alongside the Facebook pixel setup tool on the page.
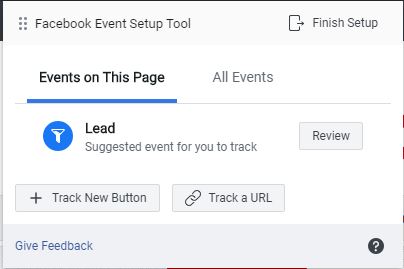
 Select the event you wish to track – button or URL – and click on the Finish setup button at the top right corner of the tool.
 Conclusion
This tutorial on how to add the Facebook pixel to your WordPress site covered all the methods available for connecting your website activity using the pixel. It’s recommended that you avoid copying the code into your header file manually. You want to make use of a plugin if you must lift the entire code to your website. I would recommend that you stick with any of the methods that leverage the official Facebook pixel plugin instead of a third party script.
Are you still having any challenge adding the Facebook pixel to your WordPress site? Which of the methods worked for you? Please let us know in the comment box below.